Friday, August 5, 2016

Garage Foundation Watering

How to build a garage:
  1. Clear land
  2. Set foundation forms
  3. Pour foundation
  4. Water foundation until garage grows
Day two, and nothing has grown yet.
Beth watering our garage foundation
Or something like that. We've been spraying water on our foundation twice a day since it was poured, to try to slow down the curing process and increase its final strength. Our garage should be delivered from Mueller sometime next week!

After about seven days of curing, it should be cured enough to start erecting our garage.

Thursday, August 4, 2016

Checking on the Garage Slab

Just a quick note today. We stopped by today to water the surface a bit and to take a look. Felipe was supposed to remove the forms today and start forming our house foundation, but it's been delayed till tomorrow morning.

We brought two 5-gallon buckets of water, and that wasn't enough for the 24' x 30' slab. We refilled a bit nearby and added some more before heading home.

Beth also decided to do a little yoga while we were there. :) The half facing North Mountain of Hueco Tanks will be the yoga room, and the back half will be the climbing/training and workshop.

Tree Pose in the future yoga room!
 The yoga side will have french doors and windows on both sides, making it essentially a 16' wide by 8' high window facing North Mountain. Quite the view for a yoga class, eh?
Down Dog in the future yoga room!

Wednesday, August 3, 2016

Pouring the Garage Foundation

Today we placed the anchor bolt templates and then poured the concrete.

Anchor bolts in their template, affixed to the concrete form.

We had a bit of trouble though; the forms were about 1/2" too long on the long side of the foundation, which would put the anchor bolts in the wrong place. If you look closely at the form below, you can see the shims we had to add.

More anchor bolt templates
 Once we finally had all of the anchor bolt templates in place, Felipe called the concrete company for delivery. The first truck brought 10 (cubic) yards.

Felipe pouring the concrete, with North Mountain, Huceo Tanks, in the background.

The concrete has been spread but not screeded yet.

We had a much later start than planned, with the truck not arriving until nearly 2:00 instead of 11:00 because of the form error. Luckily though, the clouds moved in which made it a lot cooler, helping to slow down the drying of the concrete.
After screeding and smoothing out the concrete.

Some more smoothing needs to be done
 This was definitely not something I could have done alone. I would be comfortable with MAYBE a 10' x 10' pad if I had help, since I could screed from outside the forms. I know I couldn't get the concrete as smooth as they did though!
Almost completely done!

They completed finishing the concrete tonight, and tomorrow they're coming back to remove the forms and start assembling the forms for the house!

Here's a time lapse of today's events!

Tuesday, August 2, 2016

Digging the Garage Footings

Today was a pretty difficult day of digging. Yesterday, Felipe Torres and his crew laid out the foundation forms using 2x6 boards.


These metal buildings need a 1.5" x 1.5" lip in the top edge of the slab to allow the wall sheets to sit slightly below the interior floor, so that's the extra piece of wood you can see on the inside of the forms.


We dug 16" deep, 12" wide. Luckily it rained the previous couple of days so the dirt was relatively soft. Here's my side. I think I kicked some butt today.

My digging progress
Chris had a pickaxe that he used to break up the other side. I just used my pointed digging shovel, which was definitely a bit harder. I left my trenches about an inch shallow and an inch narrow so they could finish them with nice square edges.
This is about as far as I could get before hitting drier, more packed dirt.
 And here is the finished dig.
Digging is done! I did the whole right side (30'). North Mountain, Hueco Tanks, in the background.
Digging is hard work. I moved about 1.5 cubic yards, over 2 tons of dirt!

Finally, Felipe showed up and they laid out the rebar in the footings and the mesh across the slab.
Footings with rebar and mesh
Tomorrow we'll place the anchor bolts (using templates) and then pour the concrete!

Saturday, July 30, 2016

Finishing the Pad Sites

Our land has really been transformed over the last few weeks. Mario put in a ton of work moving existing dirt around and processing the incoming dirt for under our slabs.
Looking at the house foundation area
The amazing thing is that some of these areas have been raised over 2' for the finished grade!

Moving around some extra dirt

Another view of the house foundation with West Mountain, Hueco Tanks, in the background
 And here's the finished product! Everything looks great, The only other real earthwork to do is install the septic. We also need to spread screening around to keep our dirt from blowing away. In total, we had to haul in 45 truck loads (instead of 30) and used nine water trucks. A bit more than we expected, but Beth really wanted a nice extension of the level ground for a porch around the house. The side facing North Mountain has about 6' of flat ground before sloping down to existing grade.

One more view of the two slab locations. My car is parked in the garage, the house pad will be on the left. North and West Mountains, Hueco Tanks, in the background.
Next up: Start the foundation prep work for concrete! Need to put in forms, then dig the footings, lay the rebar, and finally pour the concrete. Felipe Torres will be helping with that part.

Wednesday, July 27, 2016

Pad Sites Almost Done

We're planning on bringing in 30 dump trucks of dirt, each carrying roughly 12 tons. For this dirt, one cubic yard is about 1.5 ton, so this is a decent amount of dirt. We're building up both pads to 1' above current grade (bringing them to an elevation of about 4448').

Most of these photos are from yesterday.
Dumping some dirt! North Mountain of Hueco Tanks is in the background on the left.

Spraying water as part of the dirt processing process. West Mountain in the background.

More dirt!
It will take a total of three days to haul all of the dirt out here. I really wish we didn't have to do that, but our existing dirt is really bad. I don't know the technical description, but when it gets wet it just turns into a sloppy messy mud. This new dirt will provide a much more stable base for our foundations.

Mario processing the dirt while a water truck sprays more water.

Ponding Done, Ready for Inspection?

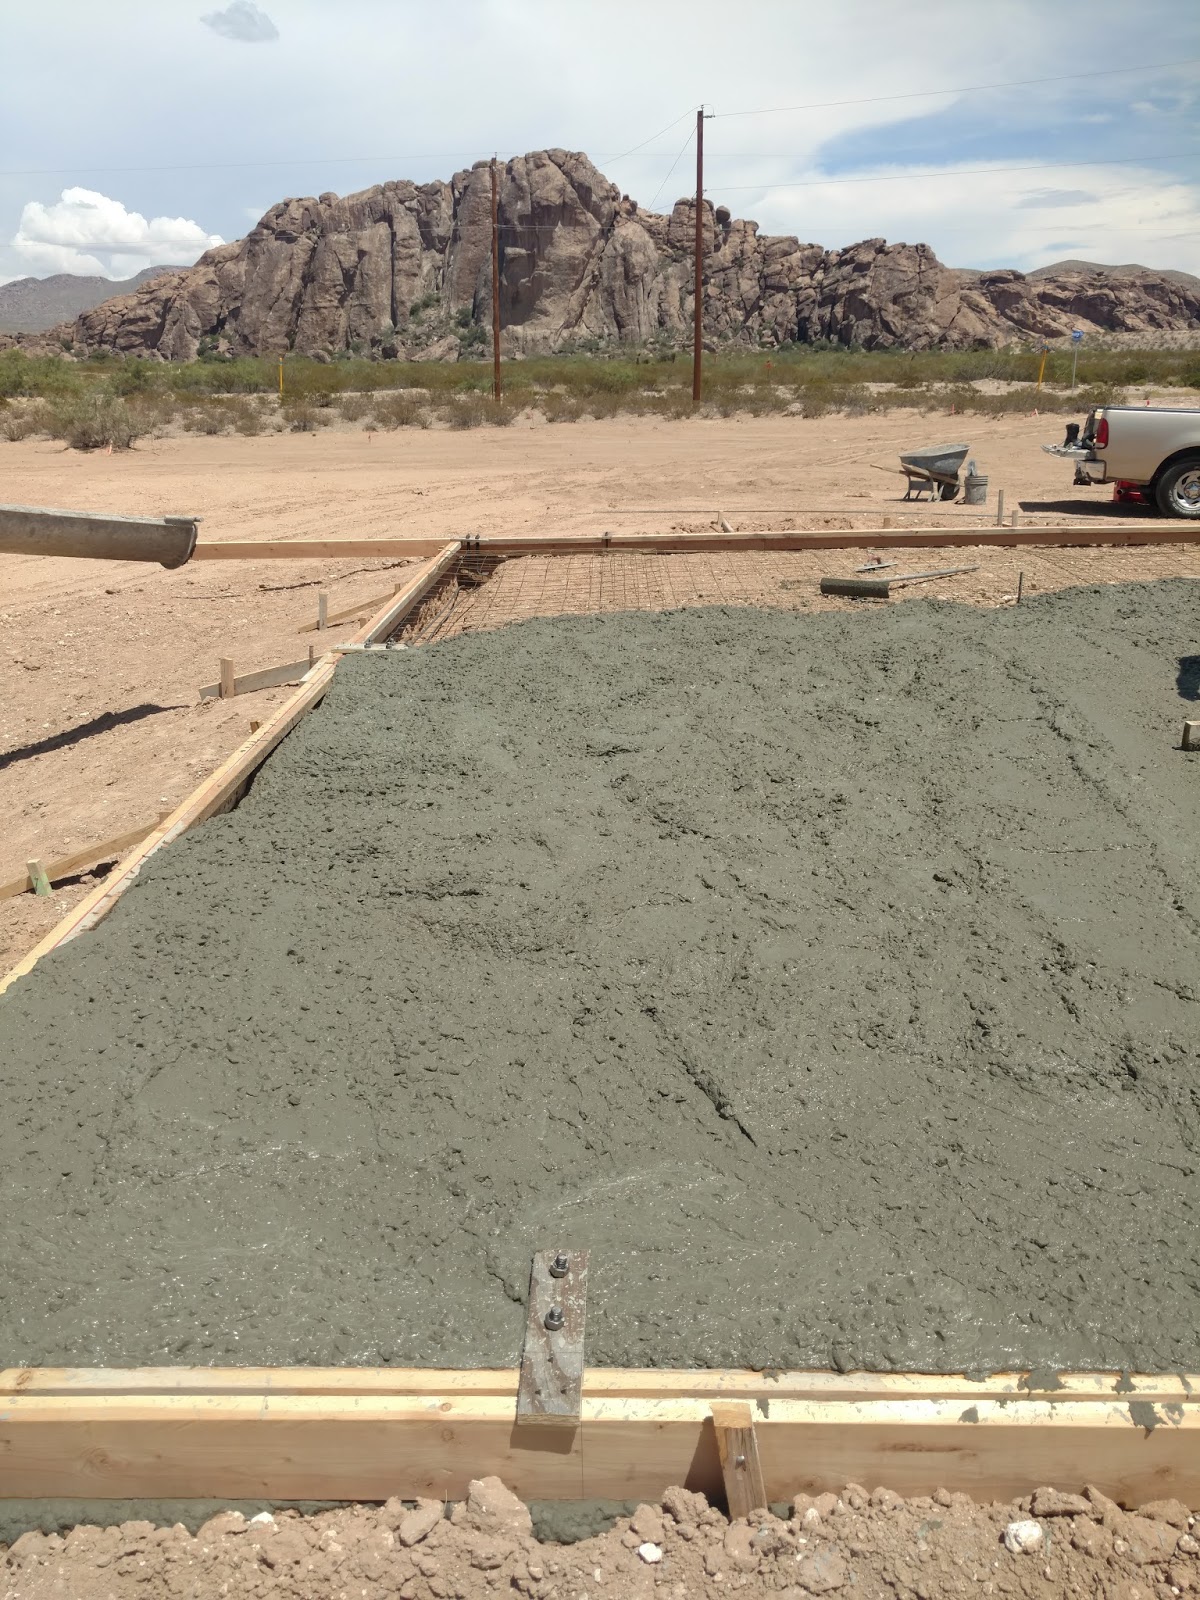
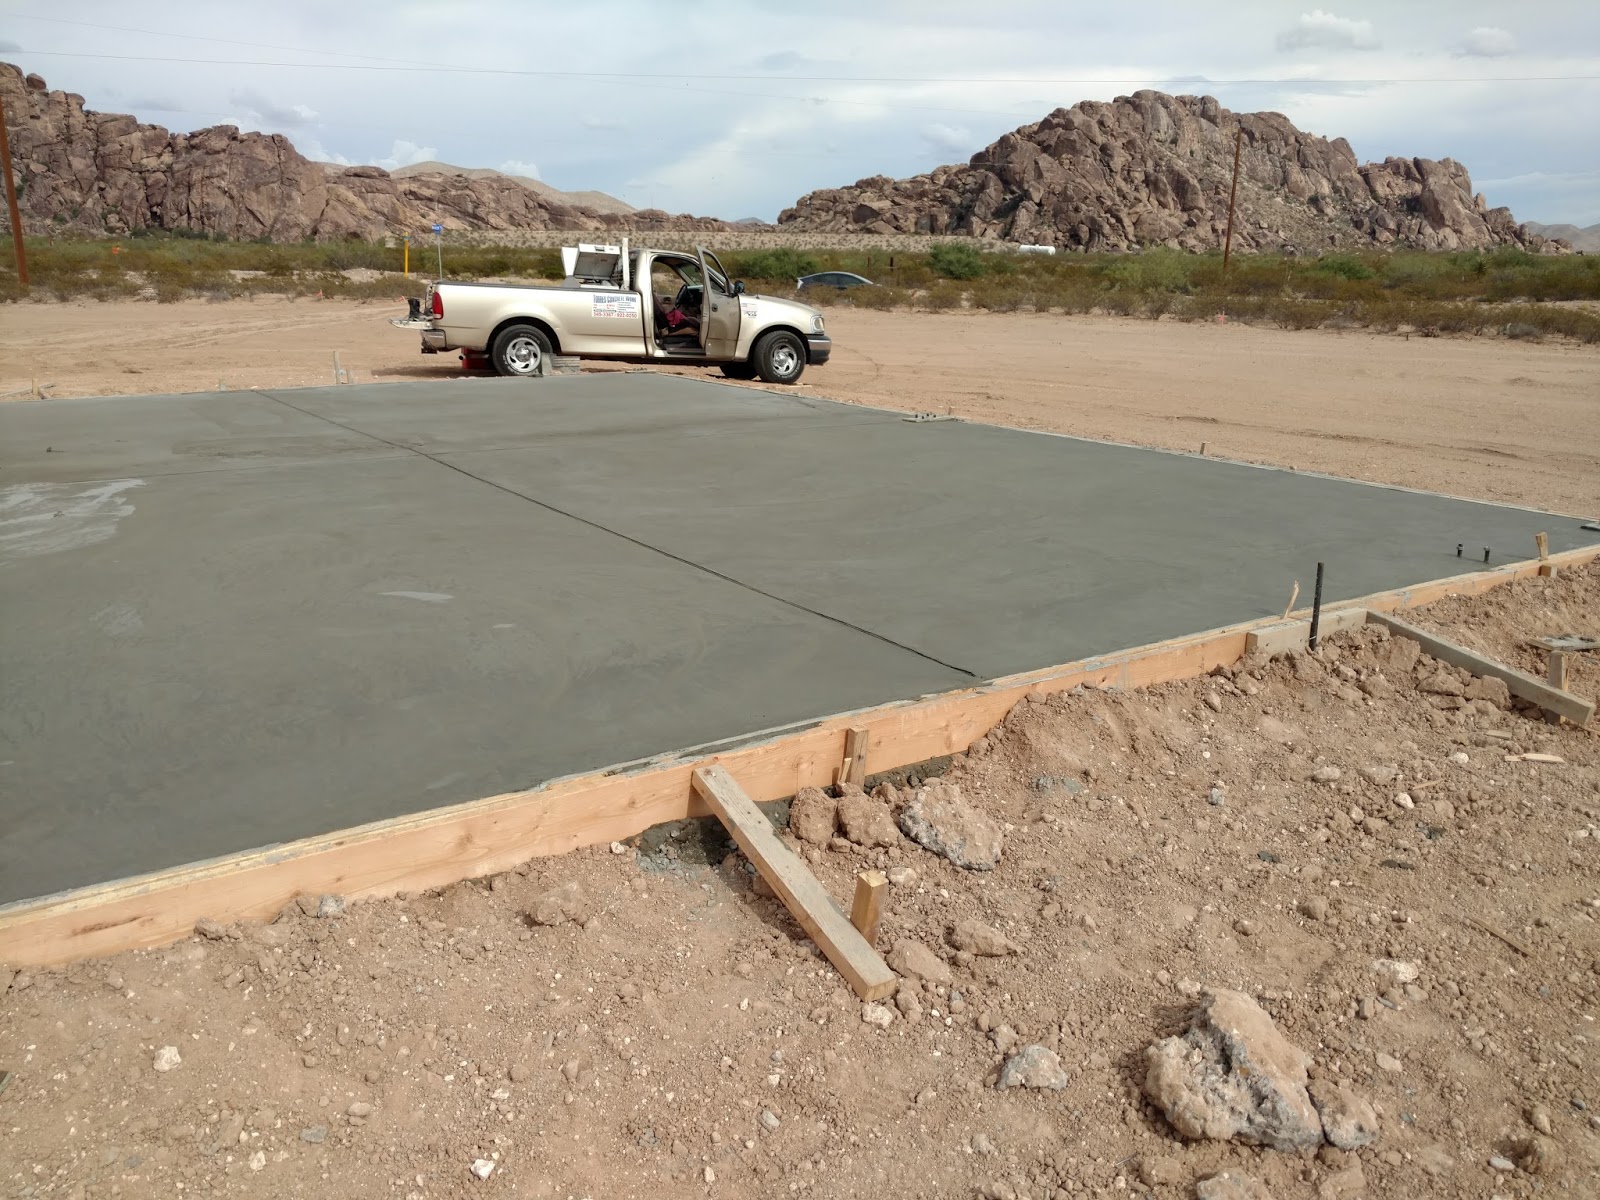
Now that our ponding is done, we should be ready for an inspection so that we can get our Certificate of Plat Compliance, right?

Wrong.

I mean, I talked with Sal Alonzo, engineer at Roads and Bridges that approved our grading plans, and he assured me THREE TIMES that all that would be inspected was the ponding area. So what could be wrong?

We had an inspector come out, Fabian, and he was concerned about a few things:
  1. Slight issue with drainage toward pond (needed slightly larger slope)
  2. No elevation marker in the pond
  3. No driveway layout (we need a paved driveway?!)
Mario fixed issue (1) by about the time Fabian left. Also, as he was leaving, Fabian called Sal Alonzo and asked about issue (2). Luckily, we don't need to add an elevation marker (6" diameter PVC, 3' long, buried completely in the bottom of our pond and then filled with concrete). Issue (3) is still an ongoing problem.

Apparently, the county wants us to pave the first 10' of our driveway, coming from Old Butterfield toward our land. The thing that makes me mad is that this is their property. There is a Right Of Way of 60' between our land and the road. There is also an oil pipeline buried under this ROW, about 12' off of the road.

I have now spoken to Gilbert Saldaña, senior engineer at the county Roads and Bridges, about this matter multiple times. First, on the phone yesterday, and then again in person today. Here's what he said yesterday:
  • Normally the entire drive must be paved from Edge Of Pavement to my Property Line. But since EOP to PL is 60', they're being nice and only making us pave 10'.
  • Paving is to protect their road from our gravel driveway.
  • It doesn't matter that no one else within a 10 mile radius of Hueco Tanks has a paved driveway entry, we have to do it just because.
Again, the problem is that we can't get utilities (electric) until we have this cert, and we can't pave our driveway without electricity. Again, nice circular logic. We also can't get onto our property via our driveway during this inspection process, since we have to lay out the driveway formwork and reinforcement and get that inspected prior to pouring the concrete. So we have to make a NEW driveway to keep working...

I kept fighting back, saying it is ridiculous that I have to pave their property and that no one else has done this in our area, but that didn't really change Gilbert's mind much. What I did finally find out was that we can get a temporary cert to get electric and septic installed. Why they never told me this before, I have no idea.

So today I drove in to Roads and Bridges, which inexplicably is downtown, even though their jurisdiction is outside the city limits. I asked for our temporary cert, and Louis Rodriguez started working on it. I also asked to speak to Gilbert. Eventually, Louis gave me two pieces of paper, one was a letter to El Paso Electric stating they should give us electric service due to a previous lawsuit between Hueco Mountain Estates and the State of Texas, the other being a sheet granting us the ability to get a septic permit. Neither document was a temporary certificate of plat compliance.

Gilbert eventually came out to talk with me, and I found out a few new things:
  1. We can NEVER get a certificate of plat compliance because we won't have city water
  2. All of these inspections and grading are so that we are compliant with our flood plain development permit
  3. He will consider my arguments against paving our driveway, as I showed him photos of their own gravel roads entering directly onto the paved roads without a 10' buffer zone.
Tackling issue (1). WHAT?! I spoke to Louis Rodriguez on more than one occasion and he said we HAD to do this grading plan to get a cert. But we can't ever get a cert. Apparently there was a legal battle a few decades ago between the Hueco Mountain Estates and the State of Texas. Texas lost, meaning the state had to allow land owners here the ability to connect to utilities (among other things) without a certificate of plat compliance. Our realtor John Mills says that Louis was around when the lawsuits actually happened. So how does he not know we never could get a cert? I even specifically asked him about that point, three months ago, as to whether we really had to have a cert to get electric and he said yes. Way to drop the ball on that one...

Now issue (2). This all begs the question, did we ever actually have to hire an engineer for a grading plan, and dig a pond, and go through all this BS? I don't know yet, because I'm still trying to be nice while Gilbert decides whether we really have to pave our driveway. But my understanding now is that no, we didn't need to do any of this. We should have been able to get this letter for the electric company, and this other document for our septic, without any ponding. I assume this because technically our ponding didn't pass inspection, yet we still got these documents. So we are now out about $7,000 and over three months behind, likely just because the county can't get its shit together long enough to remember that they were almost sued a couple decades ago for essentially this same stuff.

What did I learn? County officials don't know what they are doing. I still have yet to be given the legal standing they have to force us to pave our driveway or even require this ponding. There is nothing on their website about driveways, and I finally got a paper copy of an archaic driveway permit form which assumes your road has curbs and drainage. Which ours doesn't.

::End Of Rant::

Sunday, July 24, 2016

Starting the Building Pads

Now that the ponding area is done, we can start prepping our pad areas for our foundations. The grading drawings required us to build up quite a bit, as you can see below.

Corner of our house, with Beth and North Mountain in the background.

That stake with the neon green string used to stick out of the ground about 12". It's now buried, and the lower blue flag on the rebar is 4447', the upper blue flag is 4448'. We need to raise it up to 4448' total elevation.

Another corner of our house, with Beth and North Mountain in the background.
We're hauling in dirt to do most of this part, because of how bad our existing dirt is. You can see how low this side of the house is too. It will need to be filled in a bunch, some with existing dirt, but mostly with the better dirt.

Now we wait for dirt to get delivered.

Tuesday, July 19, 2016

Digging the Pond

After getting our land cleared, I went out and placed stakes around the pond perimeter. I also contacted our engineer because I didn't want to haul in 1000 cubic yards of dirt either. He made a field decision to increase the ponding, both in width and depth (now 2', instead of 0"). So back out I went to restake the pond area.

One big problem I ran into was identifying the locations of things on our site plan. I had a PDF copy, and I knew the scale, but I didn't have the CAD file so I had to do all the measurements manually. I initially just measured things on my paper copy using my tape measure, which worked fairly well, but it was slow. Eventually, I converted the PDF to a PNG using Inkscape (excellent free software!) and then imported it into ImageJ.

ImageJ works well for measuring microscopy images, but it worked well here too. I set my scale and then picked specific points I knew (for example, one corner of our cleared area). Then I measured the distance from that point to every corner of the pond. Once I did this with at least two reference starting locations, I could triangulate all of the ponding corners. I bought a 300' tape measure, and used a 9" nails to hold the end at my reference point, then walked out the needed distance. Since I didn't know exactly where I needed to stop, I drew an arc in the dirt at my given distance (eg, the pond length was 170', so I staked the tape measure at one corner, walked 170', then drew about a 20' long arc at 170' away). I then moved my reference to my second point, walked out the distance, and found where it intersected my arc. This method worked reasonably well, considering I was working alone, but I ran into some accuracy issues.

I also didn't realize I needed really tall stakes so we could mark the elevations. Luckily, Mario Cardenas brought a bunch when he came to do the grading, and we surveyed and staked everything again. The entry at our driveway is about 4448' in elevation. We put blue flags at this 48' elevation on all of our posts.
This stake is at the pond, and that flag is about 4' off the ground! This is before digging the pond!

Mario worked his butt off digging up our dirt and moving it around.


Another huge problem was that our dirt is very fine, so it blew away easily and caused massive dust clouds. These clouds clogged the radiators and air filters multiple times. You can somewhat see the dust clouds trailing the Bobcat.

Leveling the ground near the garage

Digging the pond

Saturday, July 9, 2016

Lot Clearing

Today was a devastating day. We had to destroy half an acre of plants on our lot, along with any critter burrows. Here's what it looked like before clearing:

Pre-clearing

We hired Martin Pantoja to do the clearing, and he'll also do our septic once we get our certificate of compliance.
The bulldozer getting unloaded with North Mountain, Hueco Tanks, in the background

Bulldozer in action, tearing up the plants. North Mountain in background.

An hour into the action

About 80 minutes in

About an hour and a half

Nearly two hours in

All done!
Next thing to do: Start staking everything for the ponding.

Friday, July 1, 2016

Grading and Drainage Plan Approved!

Finally! Only three months later (even though we were told two weeks), we now have our county-approved grading and drainage plan. Quite the birthday present.

Unfortunately, that's about half an acre we have to clear. We also have to include a 9" deep pond that is about 200' long. Kinda ridiculous, eh? But it's approved and we can finally really start breaking ground.

Another problem is that this plan calls for almost 1000 cubic yards of dirt to be hauled in (nearly 2,000 tons)! Yay engineering.

Now it's time to start staking everything out.

Tuesday, April 26, 2016

Final Building Layout

We have made some major tweaks on our building plans. Originally, we were going to have two houses, one for us and one for guests. Due to Deed Restrictions (seriously, how can someone that owned the land 25 years ago dictate what we do on it now?), we can only have one residence. So we kind of squished our two houses together:


Revit is actually pretty fun to use (except for sloped pipe work)! Here's our updated site plan too.


Monday, April 4, 2016

First Post!

Here's our first post on documenting our construction project for Blue Lizard Climbing and Yoga. I'm pre-dating it, because I've been lazy and haven't gotten around to posting these yet...

We initially planned to start clearing out lot and pouring our foundations now. Unfortunately, we hit a snag at the El Paso County Roads and Bridges office (I could write a book on our experiences with them). Out in the county, there aren't building permits. The only thing that does need a permit is the septic. And in order to get a septic permit, we needed a "Certificate of Plat Compliance" (or cert for short) for our land.

So off I went to Roads and Bridges to pick up our cert. The cert does a lot of things. It gives you an actual street address. It also allows you to connect your utilities. Oddly, there is some circular logic here. If you read the El Paso County webpage on this then it tells you that you need the following in order to get a cert:
  • Legal description (eg, warranty deed)
  • Proof of potable water ("such as a copy of a current water utility bill... [or] Certified letter from a certified laboratory indicating the [private] water [well] is of sufficient quality and quantity."
  • Proof of sewer service ("such as a copy of a current sewer utility bill") or a septic system (with a form "indicating the septic system has been registered or inspected by the El Paso City-County Health and Environmental District")
Now did anyone notice that? You must have a cert to connect utilities. But, in order to get a cert, you must show proof of water and sewer/septic service. Our land has neither water nor sewer service available, and even if it were an option, we can't get either until we get a cert. So how the hell does one ever actually get a certificate of plat compliance?!

I went to Roads and Bridges with just our warranty deed, since we didn't have anything else. Everything seemed fine at first, and it looked like we were about to get our cert. Louis Rodriguez even asked whether we wanted our address to be on Woodrow or on Old Butterfield (we chose Old Butterfield). But just before Louis went off to print our cert, he came back and told me that we couldn't have one yet. We have a small slice of an arroyo on part of our property, well away from where we planned our foundations, but because part of our land was in a 100 year flood plain, we needed a grading and drainage plan first. I asked him how we got one, and he said to look for a civil engineer that can draw one up. Great, more expenses...

So I got home and called around. I asked some friends and contractors for recommendations, and ultimately went with Del Rio Engineering. Sal Massoud said it would cost about $2,000 and take about two weeks. More than we wanted to spend, but not that bad. And two weeks seemed reasonable too. I asked him to get us a contract and we'd start right away!

Sorry, no real photos for this one. How about the layout of our initial building design? Beth and I worked on these for a while and settled on this one. It allows all the bedrooms to view North and/or West Mountain! We decided to go with a steel building (blue side panels, silver roof).